InstaShow+ Visitor Onboarding Guide: How to Set Up Your Account and Start Touring
Learn how to onboard as a visitor on InstaShow+, from creating your account to completing ID verification and scheduling your first property tour. Follow our easy step-by-step tutorial.

InstaShow+ Visitor Onboarding Tutorial: A Step-by-Step Guide
Welcome to the InstaShow+ Visitor Onboarding Tutorial! If you’re new to InstaShow+ and ready to explore properties, this guide will walk you through the entire process of setting up your visitor account, verifying your identity, and scheduling your first property tour. Let’s get started!
Step 1: Download and Install the InstaShow+ App
To begin, download the InstaShow+ app from your mobile device’s app store (available on both Google Play and the Apple App Store). Once the app is installed, you’re ready to begin the onboarding process.
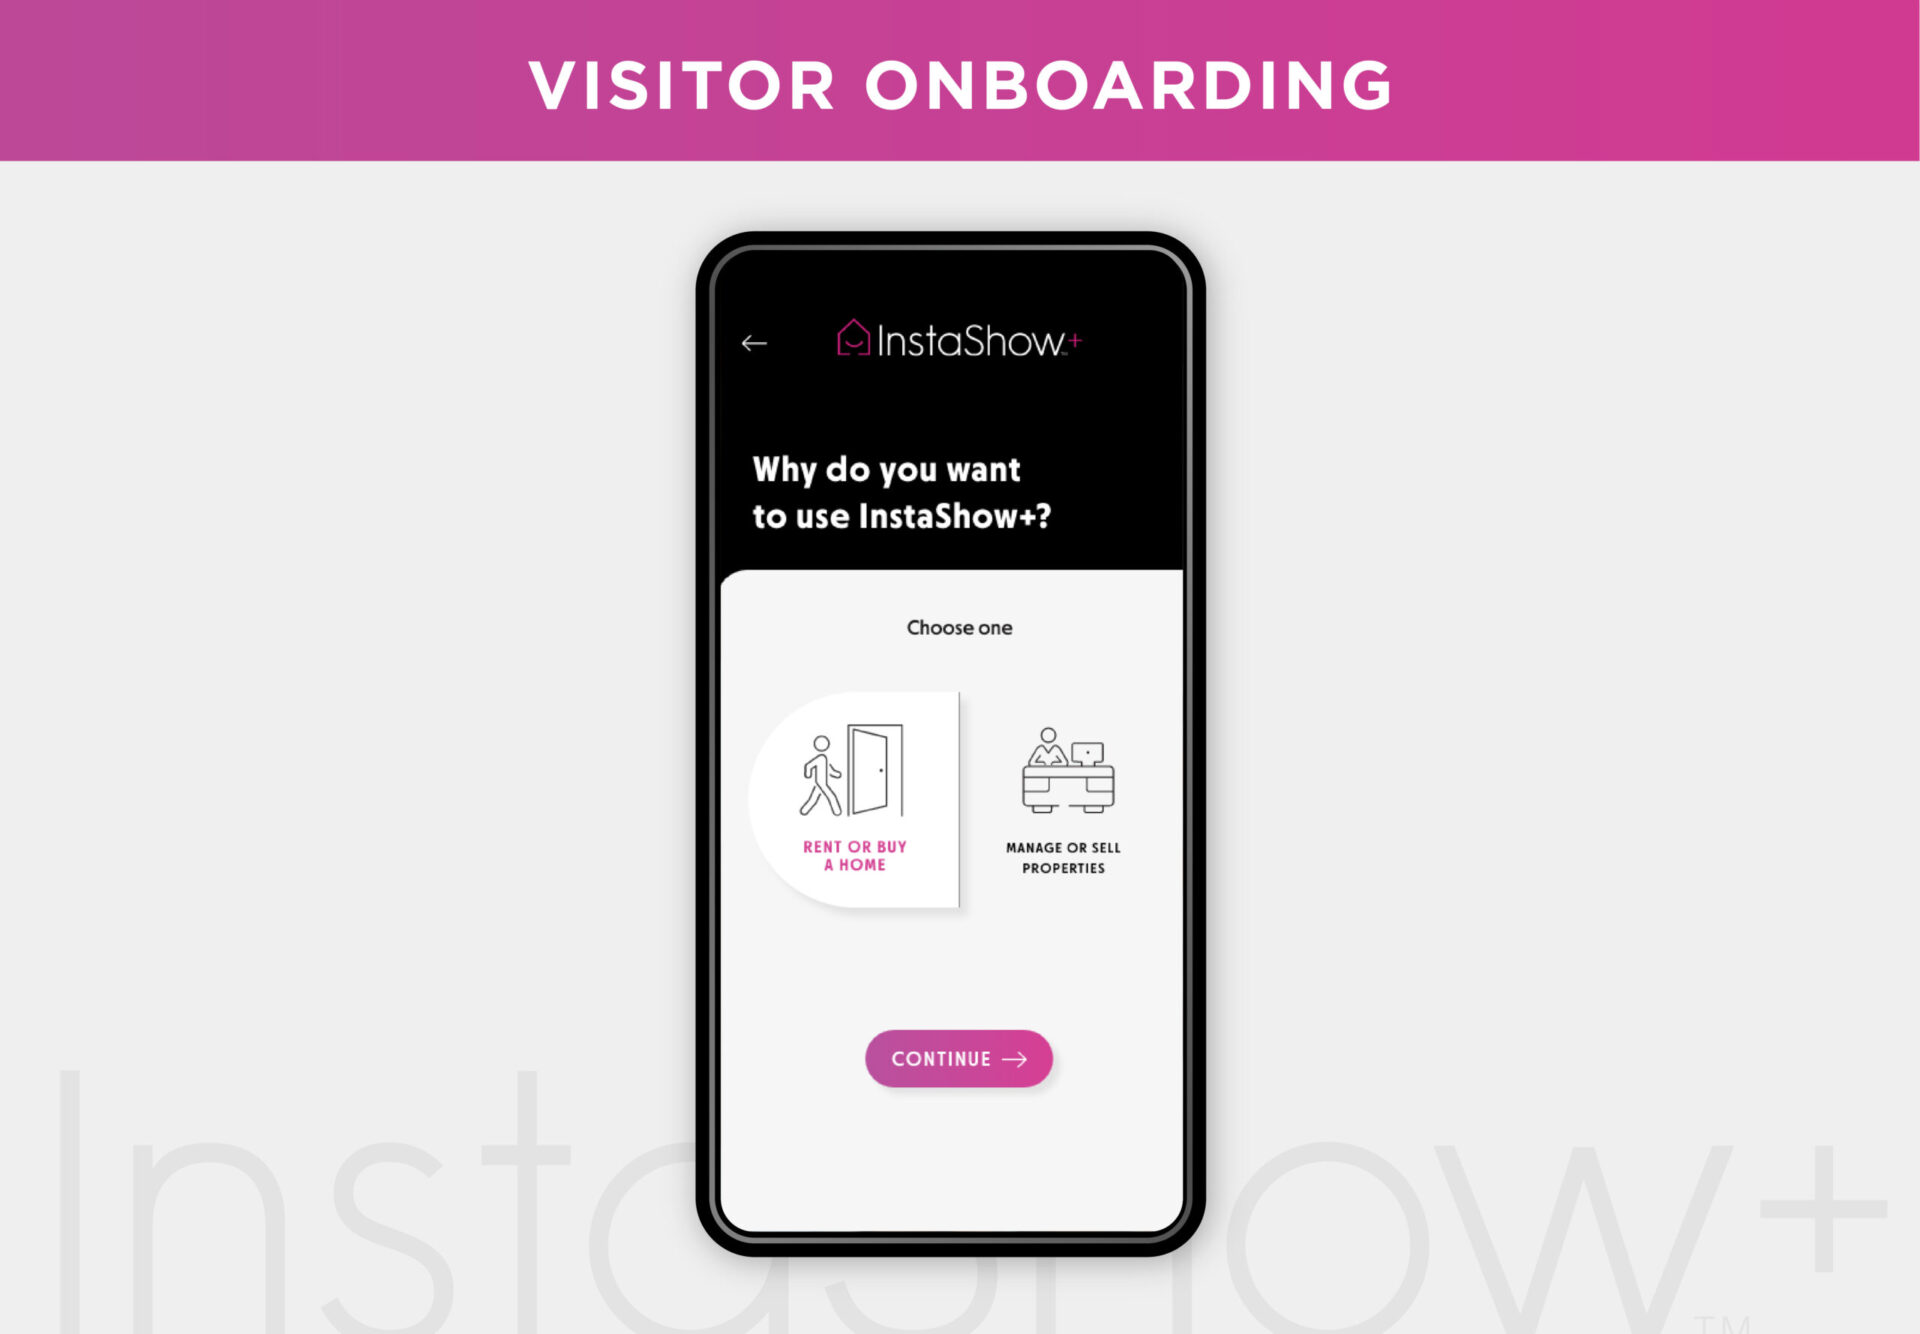
Step 2: Create Your Account
Open the InstaShow+ app and enter your credentials to create an account. After registering, you’ll be asked to select your purpose for using InstaShow+. As a visitor, choose “Rent or Buy a Home” to proceed.
Step 3: Are You a Real Estate Agent?
If you are a real estate agent, you can select ‘Yes’ and input your real estate license information. If you’re not an agent, simply choose ‘No’ to continue.
Step 4: Allow Location Services
For the best experience while using InstaShow+, allow the app to access your location. This helps you easily view properties nearby and get accurate property information.
Step 5: Search for Properties
With location services enabled, you can search for properties around you through the Map View. Alternatively, you can enter a property address or ID number into the search bar to find specific listings.
Step 6: Schedule Your Tour
Once you find a property you’d like to tour, tap “Schedule Tour” to select a time that works for you. If the property is available immediately for a self-guided tour, it will show the “See It Now” option.
Step 7: Complete ID Verification
Before you can schedule your first tour, InstaShow+ requires ID verification for your safety and security. To begin, select your country of residence and follow the on-screen prompts.
Step 8: Take Clear Photos of Your ID
You will be asked to take a photo of the front and back of your ID. Ensure that the images are clear and well-lit. Once you’re satisfied with the photos, tap “Submit” to continue.
Step 9: Take a Selfie for Identity Confirmation
Next, you’ll be prompted to take a selfie. Position your face so it matches your ID photo and blink to capture the picture. This helps InstaShow+ verify that the ID and selfie match.
Step 10: ID and Selfie Verification
InstaShow+ will compare your ID and selfie to confirm your identity. Once verification is complete, you’ll receive confirmation that your ID is approved.
Step 11: Purchase Touring Tokens
To complete your account setup, you will need to purchase touring tokens. Each tour requires one token, which can be easily purchased through the app.
Step 12: You’re Ready to Tour!
Now that your account is fully set up, you’re ready to schedule your first tour! Browse available properties, select a tour time, and enjoy your property experience with InstaShow+.
Conclusion
With InstaShow+, onboarding is easy and streamlined, ensuring you can quickly find and tour properties. From setting up your account to verifying your ID and scheduling a tour, our step-by-step guide ensures that you’ll be ready to explore in no time. Get started today and experience the future of property touring!
Stay up to date
Get the latest articles delivered to your inbox


Maximize your day in real estate with InstaShow+
Download the InstaShow+ App
Find everything you need for buying, selling and renting property in the InstaShow+ App!