Easy Guide to Listing Your Property on InstaShow+
Setting up a property listing shouldn’t be complicated. With InstaShow+, you can easily create, manage, and showcase your property in just a few steps. Whether you’re renting or selling, this guide will walk you through the process so you can start scheduling showings effortlessly.

Step 1: Set Up Your Account
Before listing your property, ensure your InstaShow+ account is set up and verified. This guarantees a smooth experience and allows you to manage your listings with ease.
Step 2: Select Your Property Type
Once logged in, choose whether you are renting or selling. Then, enter your property address. A pin will drop on the map—confirm its location or adjust it if needed to ensure accuracy.
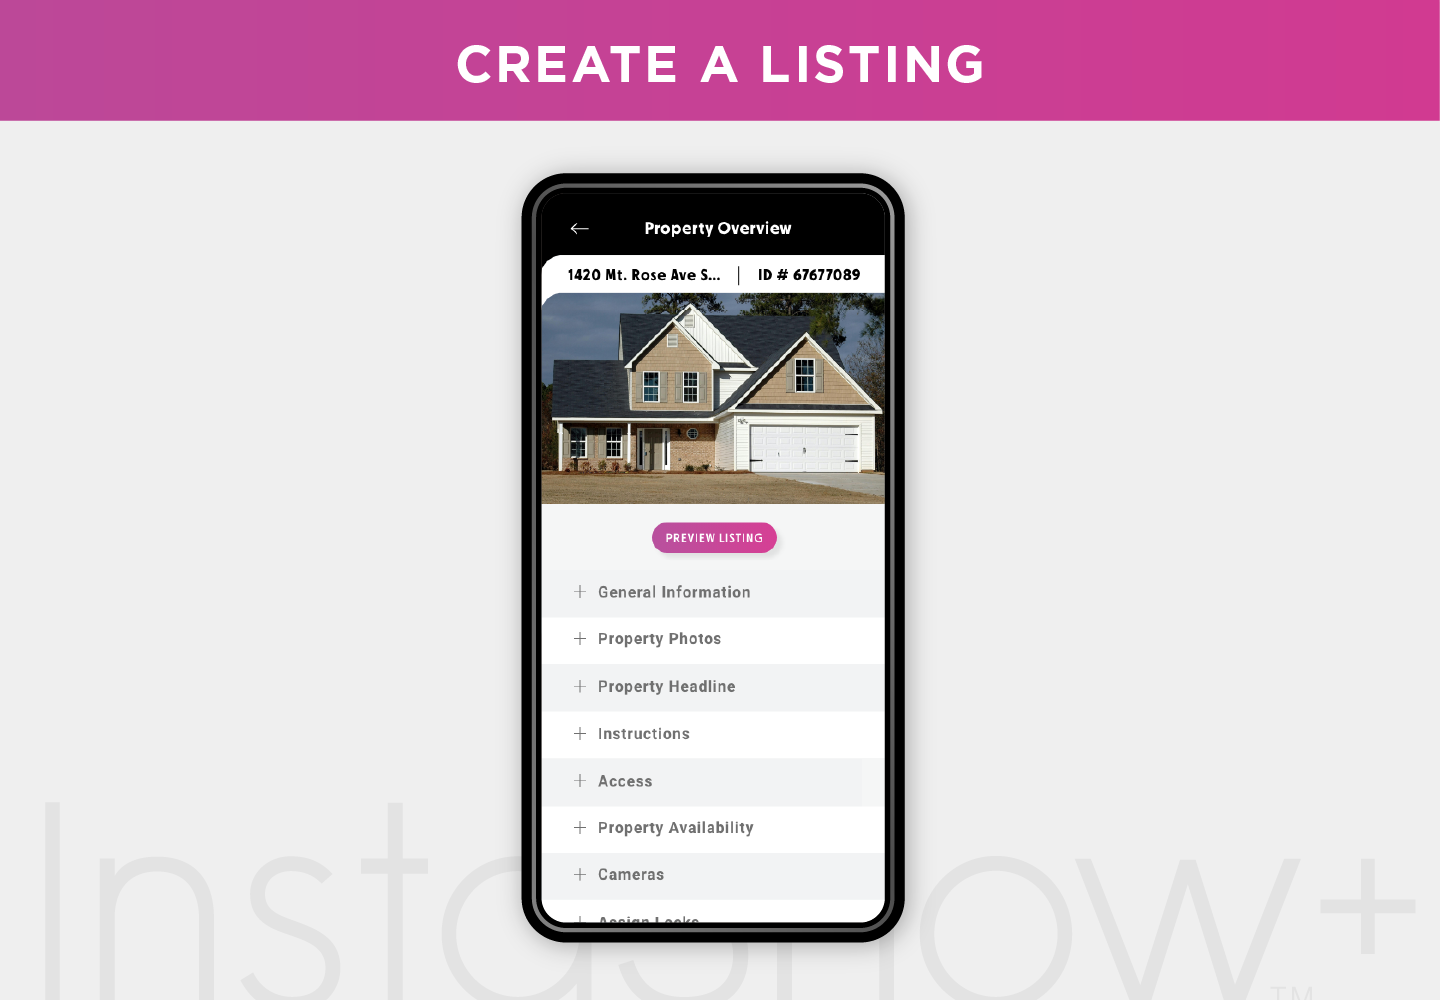
Step 3: Complete Property Details
Provide key details about your property, including:
- Square footage
- Number of bedrooms and bathrooms
- Key amenities
Step 4: Add Additional Information
Enhance your listing by including special features that set your property apart. If you have an MLS listing link, add it here for extra exposure.
Step 5: Upload Property Photos
A picture is worth a thousand words! Upload a feature photo along with additional images. You can take new photos on your phone or upload high-quality existing ones.
Step 6: Enter Access Information
If your property doesn’t have a lock, provide detailed access instructions to help visitors when they arrive for a showing.
Step 7: Set Showing Availability
Decide when your property is open for viewings. You can:
- Enable or disable InstaShow
- Require approval for showings
- Limit the number of visitors
Step 8: Add Security Options (Optional)
For added peace of mind, connect a security camera to monitor property visits. If this step isn’t necessary, you can skip it.
Step 9: Choose Visitor Access Method
Determine how visitors will enter the property. You can provide manual access instructions or use an InstaShow lock for secure entry.
Step 10: Select or Add a Lock
If using an InstaShow lock, select one already linked to your account or add a new lock for this property.
Step 11: Upload Lock Location Photos
Make it easy for visitors to find the lock by uploading clear location photos.
Step 12: Add Team Members (Optional)
If you have a team assisting with showings, invite members to help manage the listing. If not, simply skip this step.
Step 13: Set Visitor Requirements
Customize access by deciding whether visitors need pre-approval and selecting who will cover the tour access fee.
Step 14: Review & Publish
Before going live, double-check all your listing details. You can:
- Publish your listing immediately
- Save it as a draft to finalize later
Step 15: Start Scheduling Showings!
That’s it! Your property is now live and ready for showings through InstaShow+. Sit back and let the app help you manage seamless and stress-free viewings.
With InstaShow+, listing a property has never been easier.
Whether you’re a real estate professional or a first-time user, following these steps ensures a hassle-free experience for you and potential buyers or renters. Get started today and simplify your property showings!
Stay up to date
Get the latest articles delivered to your inbox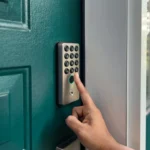


Maximize your day in real estate with InstaShow+
Download the InstaShow+ App
Find everything you need for buying, selling and renting property in the InstaShow+ App!