How to Connect Your Igloohome Deadbolt and InstaShow+: A Step-by-Step Guide
Follow our easy guide to set up your InstaShow+ with the Igloohome Deadbolt. From installation to testing, we’ll walk you through every step to get your lock ready for use.
Welcome to the InstaShow+ Igloohome Deadbolt Tutorial! Get your deadbolt ready with these easy steps, ensuring your lock is fully set up for a seamless experience.
Be sure to install the deadbolt by carefully following the instructions in the lockbox packaging.
For self-tours, place the InstaShow sticker on your front door. If you’re only offering traditional tours, skip this step and move to Step 2.
Install the InstaShow+ app on your mobile device.
Open the app and complete your registration and verification process to get started.
Navigate to the Settings section in the app.
Under the System section, select Locks and tap the “Add New Lock” button.
Select Igloohome Deadbolt as your lock manufacturer and Lock Box as the lock type.
Find the device ID QR code located on the front of your Igloohome deadbolt.
Give your lock a unique nickname to help you identify it easily later.
Scan the QR code with the InstaShow+ app to link the lock.
Tap the “Add Lock” button to finish the setup.
Install the batteries included with your lock and ensure your phone’s Bluetooth is turned on. Stand within 5 feet of the lock and tap the “Open Lock” button.
Follow the on-screen instructions to open your lock and confirm everything works as expected.
Once you’ve followed these steps, your Igloohome Deadbolt will be ready for use with InstaShow+. Enjoy hassle-free property tours and secure access management with ease!
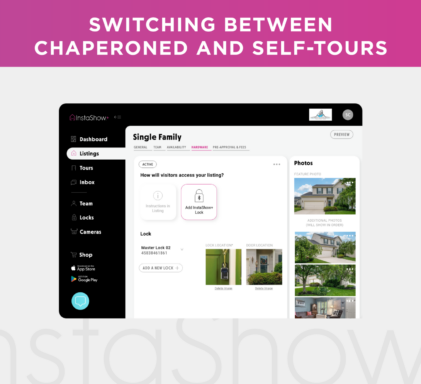
Learn how to switch between self-guided and chaperoned showings in InstaShow+ using the app or desktop. Manage locks, access, and availability settings easily.
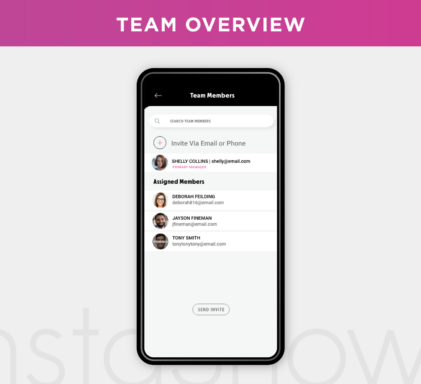
Learn how to invite, assign, or remove team members in InstaShow+—right from your app or desktop. Full control over access, step by step.
Learn how to switch between self-guided and chaperoned showings in InstaShow+ using the app or desktop. Manage locks, access, and availability settings easily.