Listing Agent Step-by-Step Guide to Getting Started with InstaShow+
Learn how to set up your InstaShow+ account and start managing property tours seamlessly. This step-by-step guide covers everything from identity verification to listing properties.


How to Get Started with InstaShow+: A Step-by-Step Guide for Listing Agents
1. Create Your InstaShow+ Account
Start by creating your InstaShow+ account to unlock the ability to list properties, schedule showings, and manage tours effortlessly.
2. Select Your Role
Once your account is set up, select your role:
- Manage or Sell Properties if you’re focused on listing and managing properties.
- Represent Buyers if your primary role is working with buyers.
For this walkthrough, we’ll choose “Manage or Sell Properties.”
3. Verify Your Realtor Status
If you’re a licensed real estate agent, enter your license number and state of registration. InstaShow+ verifies your credentials to ensure a trusted and professional network.
4. Complete Identity Verification
Security is a priority at InstaShow+. To protect your listings and ensure a secure platform, you’ll complete a quick identity verification process.
5. Select Your Country
Choose your country of residence to begin verification.
6. Choose Your ID Type
Select the type of ID you’ll use for verification. For this example, we’ll use a driver’s license or ID card.
7. Follow the Three-Step Verification Process
You’ll need to complete three quick steps:
- Capture the Front of Your ID – Take a clear photo of the front of your ID.
- Capture the Back of Your ID – Now, snap a photo of the back.
- Take a Selfie for Verification – Finally, take a selfie to match your ID and confirm your identity.
Once complete, submit your images for review. Verification typically happens quickly, but if there’s an issue, our team will manually review your submission.
8. Token Notification
If you don’t have any touring tokens, you’ll receive a notification. You can dismiss it if visitors will cover the tour access fees or purchase tokens if you plan to cover them.
9. Purchase Tokens
Select the number of tokens you need, apply a coupon code if available, and complete your purchase.
10. Start Your First Listing
Now it’s time to create your first property listing. Use the interactive map to confirm the property’s location.
11. Add Property Details
Choose whether the property is for rent or sale and enter the address. Confirm the pin’s location on the map or adjust it if needed.
12. General Property Info
Enter general details about the property, such as size, features, and other highlights. You can also include a link to your MLS listing or website for more information.
Pro Tip: InstaShow+ doesn’t market your listings directly. Include showing instructions in your MLS agent and public remarks or on syndication platforms to ensure verified buyer leads.
13. Enter Access Information
If your property doesn’t have a lock, provide access instructions here.
14. Upload Property Photos
Showcase your property with high-quality images. Upload a feature photo and additional pictures from your device or capture new ones.
15. Enhance Security (Optional)
For added security, connect a camera to monitor activity. You can skip this step if you prefer.
16. Set Showing Availability
Control when your property is available for showings:
- Enable or disable InstaShow tours.
- Set approval requirements.
- Control the number of visitors allowed.
Pro Tip: For traditional showings instead of open-touring or self-guided tours, set your availability to match your schedule. You’ll receive notifications whenever a buyer requests a showing.
17. Select or Add a Lock
Choose an existing lock or add a new one for visitor access.
18. Choose Visitor Access Method
Decide how visitors will enter the property:
- Use an InstaShow+ lock for seamless entry.
- Opt for manual access instructions if preferred.
Most agents choose the InstaShow+ lock for maximum security and convenience.
19. Add Team Members (Optional)
Need help managing your listing? Invite team members to collaborate on your property.
20. Upload Lock Location Photos
Make it easy for visitors to locate the lock by uploading a few reference photos.
21. Set Visitor Requirements
Choose whether visitors need to upload pre-approval documents and decide who covers the tour access fee. Since we purchased tokens earlier, we’ll select “Property Team.”
22. Review & Publish
Double-check all listing details, then either activate your listing or save it as a draft for later.
23. Toggle Between Roles with Ease
If you represent both buyers and sellers, the toggle feature lets you switch between roles seamlessly—managing listings and scheduling showings all in one place.
Congratulations—You’re Ready to Start Selling!
Your listing is now live, and buyers can schedule showings through InstaShow+. Enjoy the confidence that comes from knowing your properties are secure and your showings are seamless.
Happy showing!
Stay up to date
Get the latest articles delivered to your inbox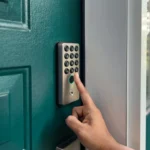


Maximize your day in real estate with InstaShow+
Download the InstaShow+ App
Find everything you need for buying, selling and renting property in the InstaShow+ App!